
If a doorknob, impromptu hockey game, or other mishap leaves a large hole in your wall, don’t panic. Even a novice can repair nearly invisible drywall with few steps and patience. To learn more, visit Drywall Repair Las Vegas.
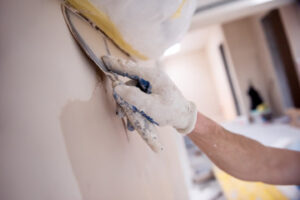 Start by carving away any ragged edges around the damaged area. Next, cut a piece of self-adhering drywall patch to size (Image 1). Apply a thin coat of joint compound over the patch and adjoining wall surface.
Small holes, about the size of a doorknob or larger, are quick and easy to fix with drywall compound or spackle. For larger holes, you need to brace the patch for strength.
Before applying a patch, clean the hole and sand it smooth. This step is important because the drywall compound will adhere to the smooth surface surrounding the hole.
If there is a stud on either side of the hole, use a stud finder to locate the studs. Aim for a level position above the hole, straddling the two studs (Images 1 and 2).
If the drywall on the edges of the hole is damaged, you can replace it with a scrap piece. This is a good way to make the wall look nicer when it’s finished.
A simple and economical solution is to buy a drywall patch kit. These kits have a self-adhesive mesh patch that sticks to the drywall. They are designed for small and medium holes, but can be used to repair large holes as well.
Before you apply a patch, use a drywall knife to spread a skim coat of spackling compound over the area. Let it dry overnight and sand lightly. Apply a second coat and sand again, as needed.
For the final step, place a drywall patch over the hole and screw it in. If there are any gaps around the edge of the patch, fill them with a bit more spackling compound.
Once the patch is in place, you’re ready to finish it. Sand the patch and surrounding area smooth, then wipe it down with a damp cloth to remove any residual dust. If the patch is in a corner intersection, you’ll need furring strips to support it. Unless you’re an expert, we recommend hiring a professional for this type of work. However, if you’re comfortable using power tools and have the time, it’s not a bad idea to try this type of project yourself. You’ll be rewarded with a nice-looking wall that you can be proud of. This is a great project to do if you’re planning on painting the room, as it will help the paint job last longer.
Filling Cracks
Cracks in walls are typically caused by movement of the structural components of the home or building. While they may be cosmetic issues, if left untreated, cracks can lengthen and widen to the point of serious damage.
To repair a crack, first use a utility knife to open the crack slightly and remove loose material. Next, sand the area where the crack is. Make sure to sand the tape as well, although it’s usually not necessary to sand non-taped areas. Then, apply a thin bed of patch drywall compound over the tape and spread it with a drywall putty knife, making sure to cover the entire surface of the crack. Allow the compound to dry, then sand it lightly with 100-grit sandpaper to remove ridges and blend edges. Finally, prime and paint the wall.
Nail and screw pops are common drywall imperfections that can be fixed in the same manner as other holes and cracks. However, since they occur near the end of a fastener, they tend to push the drywall paper up.
When two drywall sheets meet at a corner, they’re protected by a metal strip called a corner bead. While it’s pretty sturdy, it’s not indestructible and can get dented by furniture or a vacuum cleaner.
If the dent is small, it can be filled with a single coat of lightweight spackle. Use a drywall putty knife rather than the kind of narrow utility knife you’d use for wood putty. Smooth the filler until it’s flush with the rest of the wall, then allow it to dry.
Larger dents and divots are more difficult to fix. You can try to flatten them with a hammer and nail set, but more often they need to be spackled and resanded.
To respackle a divot, first remove any loose or crumbling drywall paper with a utility knife. Then, widen the crack with a utility knife and clean away dust from the widened area. After sanding, apply a second coat of spackling, then sand again, and repeat as needed until the divot is level with the rest of the wall.
Repairing Holes in Ceilings
If a leaky roof or a fallen baseball hit through the ceiling, you’ll need to cut and install a patch, fasten it securely and fill in the hole with joint compound. You’ll also need to sand the patch and the surrounding area to smooth out the ceiling. Fortunately, the job is not as complicated as it might seem. With the right tools and knowledge, you can quickly turn your home’s interior into a room that looks as good as new.
Before starting, take a ladder to the space where the hole is located and put on a pair of safety goggles that fully cover your eyes. You’ll be working right under the hole, and debris and dust will be flying up in your face, so more protection is better. It’s also a good idea to wear a dust mask.
The outside corners of drywall are protected by a piece of L-shaped metal called a corner bead. This can be damaged by many things, from run-ins with the vacuum cleaner to children flinging toys against the wall. If the corner bead becomes dented, it can cause the drywall surface to crack and crumble over time.
To repair a damaged drywall corner, remove the paper from the corner bead using a utility knife. Then use tin snips to cut a piece of new metal corner bead to replace it. Screw the bead in place, then apply a thin coat of drywall joint compound to the bead and the surrounding drywall surface. Let it dry, then sand the surface to smooth it.
If the damage is severe, you may need to add a piece of drywall board. Measure the width of the damaged section and cut a sheet of drywall three to four inches longer. This extra length will give you a small margin of error when installing the replacement.
If the drywall damage is minor, you can simply touch it up with a dab of touch-up paint that matches the color of the wall. But if you want a perfect finish, shine a light straight down on the repaired areas to check for any pock marks or high spots.
Repairing Holes in Walls
A hole in a wall can not only be unsightly, but it could also serve as an entry point for unwanted critters. Moreover, even small holes can leave the walls vulnerable to structural damage and moisture problems. Therefore, it is important to repair any drywall holes as soon as possible.
For small holes in drywall, fill them with a thin layer of joint compound (also known as drywall mud) using a putty knife that’s made specifically for drywall (not wood-type utility knives). Smooth the compound until it’s flush with the wall. This method is effective for minor scratches and dents smaller than 1/2 inch across, but larger gouges require reinforcing mesh prior to spackling.
If the hole is very large, you can use a drywall patch to cover it. Before applying the patch, cut a piece of drywall that’s twice as large as the hole and line it up against the wall. Using a utility knife, trace around the back of the drywall to square it up with the opening. This step is important because it prevents the new drywall from collapsing inward.
Before cutting into a wall, check behind it for unused wiring and plumbing lines. Utilities typically run along studs in the wall, so it’s important to locate them before cutting into your drywall. You can do this with a utility knife and a level or a handsaw, but using a stud finder is much faster and more accurate.
When repairing nail pops or other small drywall holes, make sure that the surrounding edges are smooth and free of any debris. This ensures that the adhesive patch sticks well to the drywall and will not pull away or crack later on. If the edges are rough, sand or scrape them down with your utility knife and then use the edge of your putty knife to spread and smooth the joint compound.
For any large holes, it’s essential to brace the hole to avoid it collapsing inward on your house. A simple solution is to place a piece of plywood or 1×3 wood on both sides of the hole. You can then screw it into the drywall, which provides added support and helps keep the drywall patch in place.